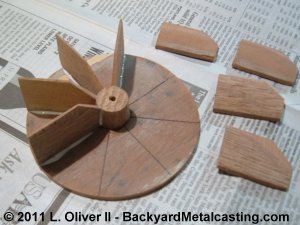
The rotor is simply a disk of thin wood, several air vanes of the same thickness ("thinness") and a central hub to hold it onto the motor shaft. Here the vanes are being glued into position. This rotor is 4" diameter. Prior to cutting out the disk, the lines for the air vanes are drawn on at the proper angle. The angle is determined by dividing 360 degrees (a full circle) by the number of vanes. In this case there are 8 so they are placed at 45 degrees of each other (360 divided by 8 equals 45).
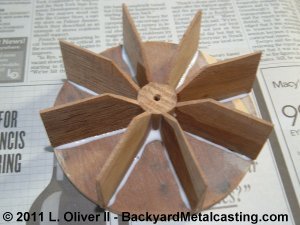
Here's the rotor with all the vanes and the hub glued on. The glue was applied quite liberally for a strong bond. All of the vanes and the hub are tapered, being thinner at the top edge for draft. It is of course possible to make a blower wheel with slanted vanes but in this size range that doesn't seem to make much improvement. And additionally the same strait vaned wheel can work on both clockwise and counterclockwise rotating motors. While a separate angled vane wheel is needed for each motor direction.
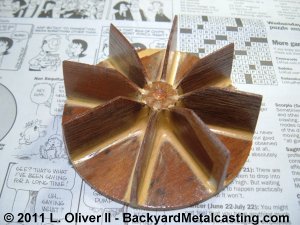
Here is the rotor or "blower wheel" finished with it's three coats of polyurethane. The tan colored material in all the corners is wood filler to create a transition from the horizontal to vertical surfaces. Also notice the slight "dimple" in the center of the hub. This will locate the hole to be drilled for the motor shaft on the finished casting. This pattern is complete.
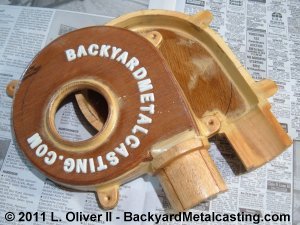
Here is the finished blower body. You can see both pattern halves, they are coated with three coats of polyurethane. I personalized the pattern with the website address because it adds an extra layer of "awesomeness" to the casting... Hey, if you can cast metal why hold back??

For the sake of experimentation I decided to make a blower of both types, the spiral or "scroll" type (on the left) and the circular type (on the right). They are approximately the same size for a fair comparison test. In this photo you should clearly see how the "spiral" blower has more of an "unwinding" shape while the circular one is basically a plain circle. Click photo for a larger view
Change of plans...
The patterns made in the example above have not been used to make castings. The original purpose for them was to make a mini blower for the Hot shot waste oil burner but I changed plans. So for "closure" of these pages I included some photos of a blower I cast in 2007 to replace my original large oil burner's blower.
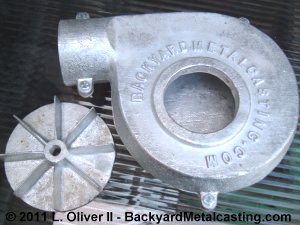
Here is my refined blower design. This is the 2007 model year blower. It's cast from the same pattern as the original blower that I made in 2003 after modifying (updating) the pattern. It says "BackyardMetalcasting.com" cast into it. Yes I said "model year 2007". I made this back in 2007 for the finished version of the "Hefty Harriette" furnace.
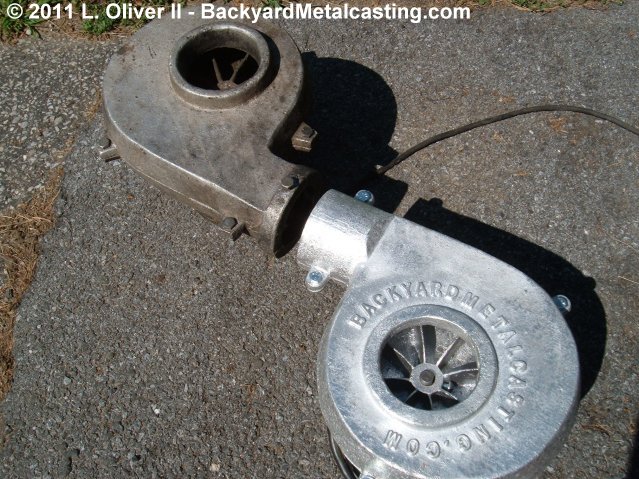
Here's a comparison between the original (year 2003) blower and the 2007 model year blower. It's a bit smaller and has an improved exit port designed to slide onto 2" steel pipe as cast. While the most important attribute of a foundry (aside from safety) is that it works effectively I see no problem with putting some effort into it's appearance as well. I've found that a ragged looking furnace can really make a yard look "junky." So if I can add an attractive element to the design I'm more than happy to. Click photo for a larger view
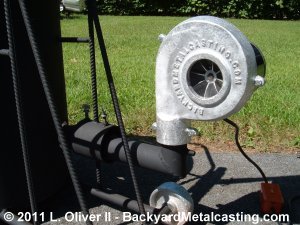
Here's a look at the blower mounted on the burner for Hefty Harriette. You'll have to wait for the conclusion of the Hefty Harriette pages to see what the furnace design actually looks like.
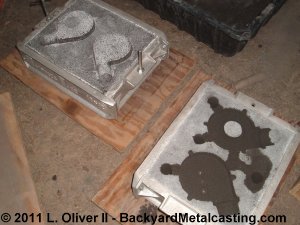
I just threw this photo in. Here's a photo I found (probably from 2005) of a mold for a very small blower about the diameter of a music CD. The blower was so small it put out too little air for any practical use. I don't have a photo of the blower itself.