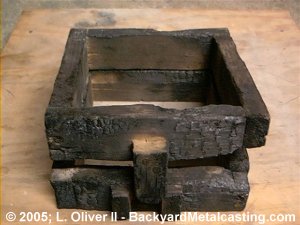
The Lab's flasks are put through extreme usage and wood just didn't cut it... Every time metal spills onto the flask during a pour the wood get's singed. And I was CAREFUL with this flask! So I decided to make flasks from metal. While I could weld pieces of steel plate together that might make for a very heavy flask. So I decided to cast them from aluminum.
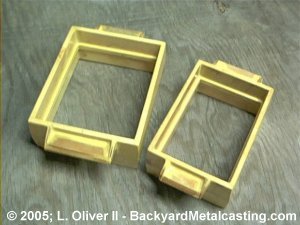
Ok, here you see the wooden flask patterns. They took awhile to build because I'm not much of a woodworker and I was trying to be as precise as possible. The patterns are for; 6" X 9" and 8" X 10" flasks. I also have a 5" X 6" flask pattern but it was built after this photo was taken. I actually built these patterns in 2002 but never got around to successfully making any flasks with them until 2005 when I decided to add this page to the June/20/2005 website update. I guess it took this long because to cast a flask you need and even bigger flask. And most importantly you need to be able to melt a sufficient quantity of metal. I've seen flasks that were cast from patterns made from Styrofoam in the "lost foam" process but it seems like a lot of work to make a pattern for only one use.

Since I wanted some much larger flasks I decided to make flasks from individual panels. This way I can cast the individual panels using "normal" sized flasks rather than using a gigantic 300 pound mold to cast a big one piece flask. I made patterns and cast 4 of each. Steve Chastain details a slightly more technical (more complicated) flask in Book 1 of his sandcasting series, also built using the panel principle. The book is worth buying because there are other project idea and valuable information in it.
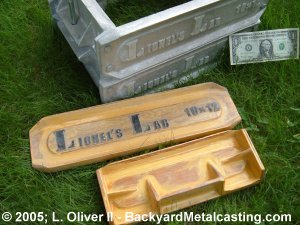
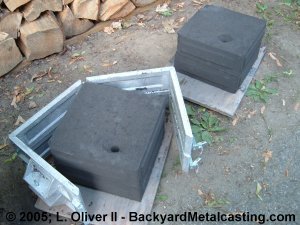
The patterns are basically just flat plates with the edges built up so the flask halves can sit on each other. The alignment pin panel is more complex but still simple. Basically just a flange for the alignment pin and some gussets for structural support.
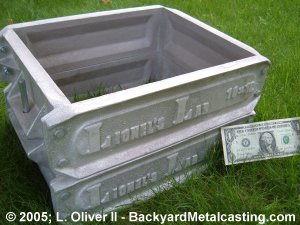
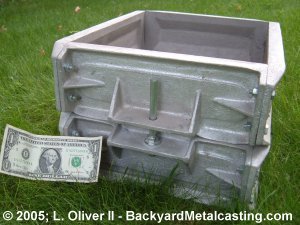
Here is the assembled flask. Personalized of course with the Lionel's Lab text logo. The 10 X 12 represents the size in inches of the inner area of the flask. I intend to make longer panel patterns so I can make flasks of various sizes and make wooden flasks obsolete (except for casting work requiring an odd sized or special flask). Also notice how the inside of the flask panels are recessed. When ramming the molds the sand get's wedged into these recesses locking the sand in place. No need for a ridge. The ridge method also decreases the flasks inner space slightly.
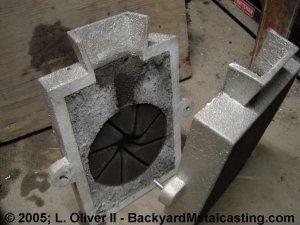
This is a look at the alignment pin assembly. The pin is made from a 3 or 4 inch carriage bolt with the head cut off. Nuts and washers clamp the bolt to one flange and a hole to accept the bolt (alignment pin) is in the other flange.
This is an interesting flask type. I've once read that it's called a "Bronze caster's" flask. These are commonly used for jewelry casting. The flask is used while it's standing upright in a vertical position and the metal is actually poured through a "spout" passing through the top wall of the flask. I made this flask for novelty and fun. This flask has inside dimensions of 7" X 10" give or take about 1/8". I think the benefit of it is that the metal falls straight down into the mold cavity ensuring that it fills. This feature is valuable with metals like bronze and brass which can cool before filling a regular style mold.
This here is a snap flask next to an un-flasked mold. A snap flask is hinged at one corner and can open in the opposite diagnal corner. This way after the sandmold is made the flask can be unhooked and used to make another mold! Then the molten metal is poured into the un-flasked sandmold. Slick!! The benefit here is that one flask can make MANY molds rather than needing a new flask for each mold. This particular snap flask has a 12" X 12" inside area. I currently only have enough molding sand to make about 3 or 4 of this size mold.