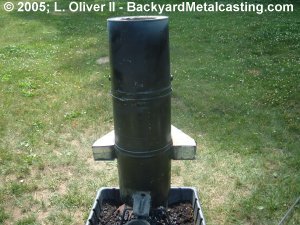
Here is a picture of the finished cupola furnace. This is about as good as it's gonna get too. This is just a slapped together thing just too see if I can actually melt iron with hardwood charcoal. I actually think it'll work (at least a little). It's about 4 feet tall and is on a steel cart that I welded together. The bore is 7" diameter. I hope to get about 10 pounds of molten iron every 5 or 6 minutes from this cupola.
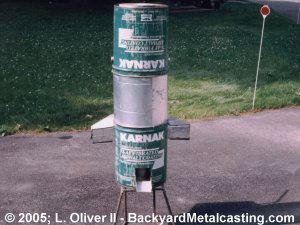
This photo is of the cupola shell before refractory and painting. It is riveted together from some 5-gallon metal buckets with a sheet metal extension in the center. I had to clean roofing tar out of these buckets with solvent and it was a sloppy, messy, disgusting, despicable job. The solvent (turpatine) dissolved two pairs of rubber gloves and I messed up a pair of pants also in the mess. But the tar dissolved in solvent is a nice fuel in my waste oil burner... hot and smokeless! In this photo you can also see the she spout "platform" and part of the unfinished steel cart also.
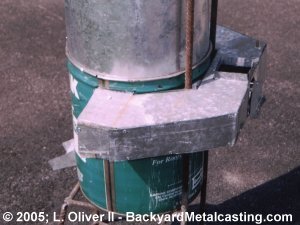
The air enters the furnace on two sides. I chose to build a sheetmetal "apparatus" to split the blower's air equally. At first I was going to use pipes and fittings to do this but they just offered the air way too much resistance which greatly decreased it's pressure. This air chamber slides onto intake flanges attached to the furnace.
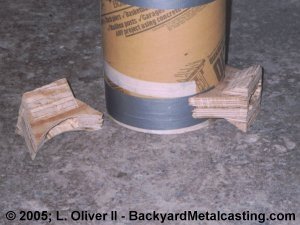
The air enters the chamber through a passage which widens out providing air to a larger portion of the coals. These wooden forms will leave the properly shaped passage in the refractory and burn out when I first fire the furnace. The location of the form in this photo is for illustration only. It's actually located much higher in the actual furnace.
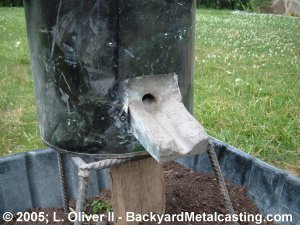
At this point the refractory is rammed in place and this is a view of the spout. I've removed the piece of broomstick used to form the spout hole and carved the refractory. It took about 2.5 hours and I was happy as hell when I finally finished. The next cupola I build will NOT have a shell made from thin buckets! The shell with it's height contorts to much with the ramming process.

Since the refractory is in place it's easier to form the "drop bottom." This is a trap door type of thing that drops open at the end of the furnace run and empties the contents of the furnace. My design is just a basic pivot type mechanism.

Here I'm welding the furnace cart. It's made from steel rebar. I intend to cast some iron wheels for it. Iron wheels are necessary so they don't melt when the contents of the furnace are cleaned out through the bottom hole after the melting is complete.

While completing the welding on the frame I welded together these bott (or is it “bod”?) and tapping rods. The bot rod is used to plug the furnace's spout with a clay/sawdust mixture so the molten metal can build up in the furnace. The tapping rod is used to chip the bott plug away from the spout to allow the molten metal to flow into the ladle or mold.
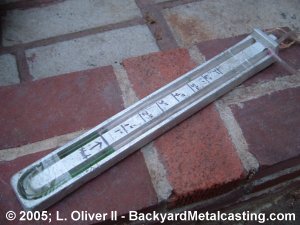
I've cast this manometer (sometimes called a "U-tube manometer") for measuring the air pressure in the airchamber entering the furnace. The device is simply a guage where air enter a tube with some liquid (water and food coloring) in it. The pressure of the air pusses the liquid and the distance that the liquid moves is the air pressure in "inches of water column." I think this is how gas pressure for homes is measured also. Now it's time for some action...