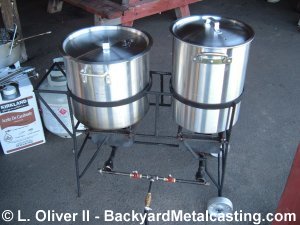
Here is the finished unit. I completed it the day before the event. Mostly because it was one project amongst the many other projects I seem to always have going on. I built it with two chambers so I can fry two different items at once, such as fries in one and fish or chicken in the other. Or one chamber can be used for boiling food such as corn or seafood. Each chamber has it's own burner.
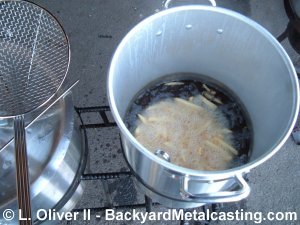
Here are some french fries frying in the tall, narrow pot. The deep fryer works tremendously well! The only drawback was that one of the burners was malfunctioning so I ended up only using one chamber. It was no problem though and I'm going to replace both burners with a new design of mine anyways.
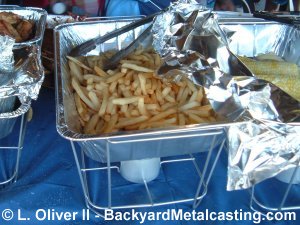
Here are some of the finished fries on the buffet table. They sure tasted great! After dropping the hot, steaming, golden fries into the pan I sprinkled a little salt over them and the bit of oil on the surface just sucked it in for the perfect balance of flavor. For anyone wondering, the fries were bought in frozen 30 pound boxes (six 5-pound bags of fries per box). And they were fried in a 50/50 mix of peanut and soybean oil.
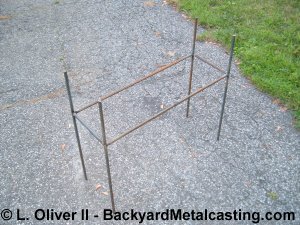
I began by constructing a basic framework. It's built from my favorite building material (steel rebar) since it's inexpensive and very strong. And it can be worked similarly to mild steel.

Next I welded on the rings that would keep the pots in position in the framework. They were rolled from flat steel strap. Notice that I also bent the legs outward a bit for more stability and better looks.
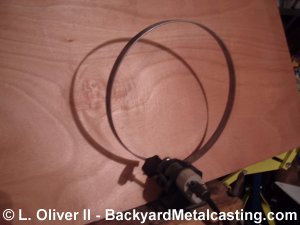
Here is how I rolled the rings. I have a small bench-mounted ring roller.
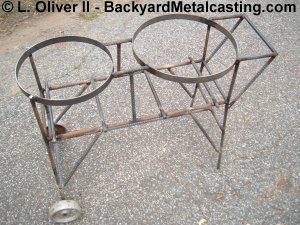
It may be hard to differentiate the parts in this photo but I've added wheels, a handle and some reinforcements to the framework. It has a nice firm and hefty feel to it when rolling it around.

Here is a prototype burner that I built (in the center) and a commercial burner from a turkey fryer on the right. I roughly modeled the burner after the turkey fryer one. I cast it in aluminum using the pattern made from a modified flowerpot (on the left). The prototype burner worked very well and I would have used it if I had cast it in iron instead of aluminum. Unfortunately my iron melting furnace was not completed yet at the time of this construction.
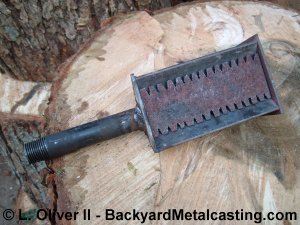
Here is the burner design I went with. It is made from a piece of angle iron and has a steel plate with notches cut out to release gas for the flame. It worked great but I had to install a "baffle" assembly under the notched plate to get it to burn smoothly. Overall though I think the round burner design is better.
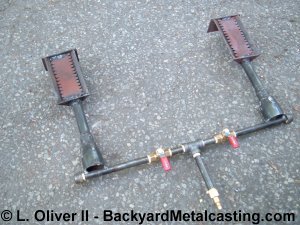
Here are the two burners attached with a manifold type assembly. One propane tank could fuel both burners simultaneously or I could use either burner solo. I can regulate each flame with the individual ball valves. Continue to part 2.