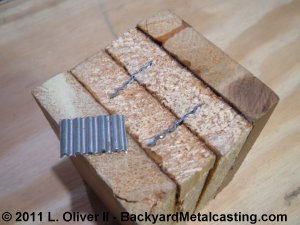
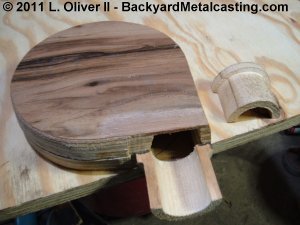
The two block sections are fastened on one end (the end that will be mounted in the lathe chuck) with corrugated fasteners. One of these fasteners is shown ontop of the blocks. There is also a bead of glue running down the center of the seam lengthwise to assist in holding the blocks together. The glue bead will ultimately be cut away when the nozzle is bored out.
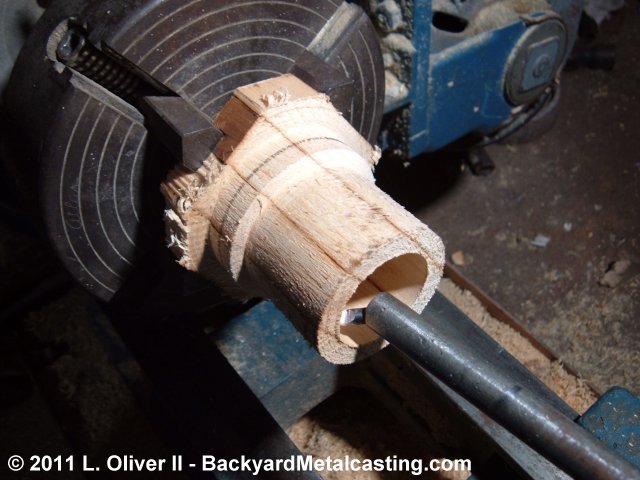
Here is the block assembly mounted and centered in a four-jaw chuck. Obviously the outside shape of the nozzle has already been formed and the inside is receiving it's final bore. This is a metal lathe and I machine the wood as if it were a piece of metal. The technique works fantastically. As mentioned previously the inside of this nozzle is sized to fit over 1" pipe (so it is bored out slightly large to allow for casting shrinkage) and to fit inside 2" pipe. So the blower can be used with burner tubes of either size. Click the photo for a larger view.
With the nozzle complete the air outlet is cut open on the blower body pattern and a flat spot is cut at the outlet to glue the nozzle to.
The nozzle is now ready to be glued on. I align it with the opening in the blower body and glue it with the common white or yellow glue. The newspaper is in place to prevent the pattern from sticking to the board.
The second half of the pattern is then aligned with the first half and the remaining nozzle piece get's glued on in alignment. Be careful not to glue the patterns halves together.
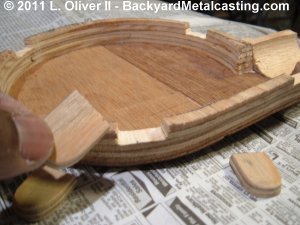
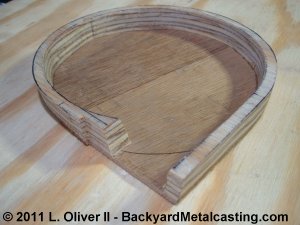
Here I've cut slots in the pattern halves to glue in these tabs. The tabs on the finished blower castings are where the bolts are installed to fasten the halves together.
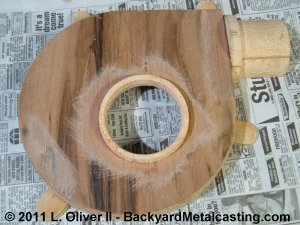
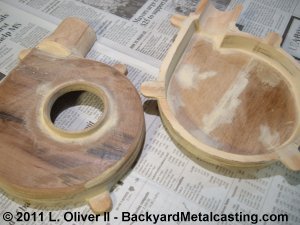
After the four tabs (for bolt locations) are glued into the pattern I cut a hole in the pattern half that will be the air intake side of the blower (the other pattern half will be the motor side). An "intake ring" is glued over the hole to improve the air flow. There must be draft inside and out of the ring.
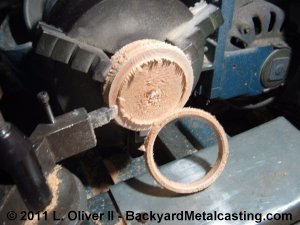
Here how I formed the intake ring from a block of wood on the lathe.
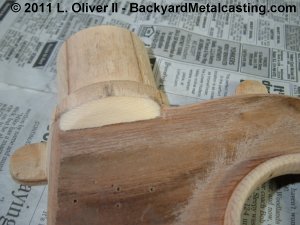
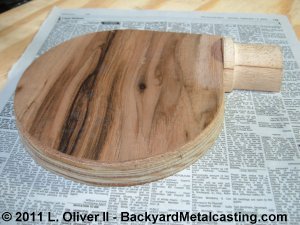
For reinforcement and a smoother look I glued a small triangular strip of wood behind the nozzle. Once the glue was dry it was sanded to a nice contour.
Here is the blower body pattern all smoothed over with sandpaper and wood-filler where needed. At this point I will begin building the blower wheel or "rotor." Continue to part 3 for the blower "wheel" and final tasks.