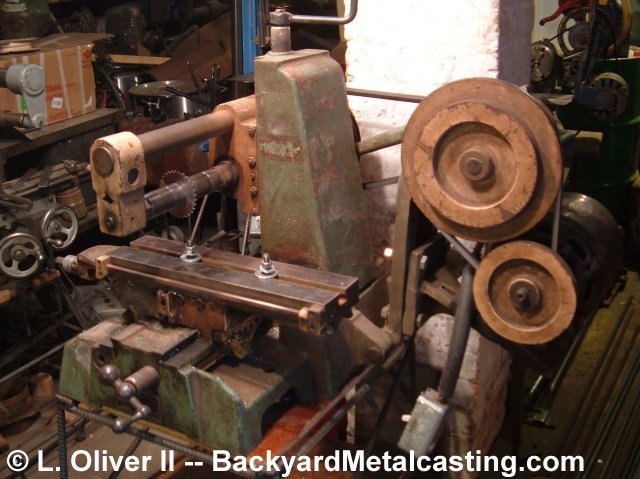
Here's a look at the milling machine setup and ready to go (in fact I've already used it to machine a block of aluminum for one of my projects). I have it cleaned up in most of the critical areas, it's greased and I've redone the wiring for the switch and added a new power cord. And of course it's on the workstand I built for it. It may be "ugly" and dirty but it sure can mill some metal! But before I get into using it I'll detail a little more of the prep work. Click the photo for a larger view
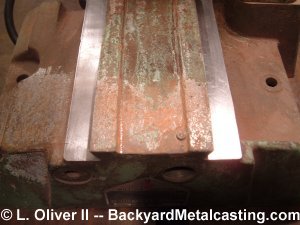
Here are the slide ways that the carriage rides on. Notice what nice condition they are in after I removed the old grease. You might be able to see the pattern left on them from what I'm guessing was the original scraping operation (just barely visible on the right side). I don't think this machine has seen much use I think it just sat around collecting dust and the thick grease protected it. The old grease had turned to a sticky tar-like material and once I removed it and applied new grease the slides work so smoothly!
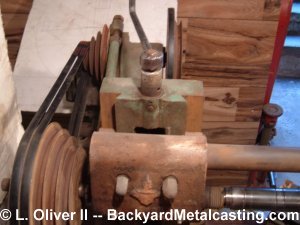
Here you can see the drive belts for the spindle. Note that there are two belts. As mentioned on an earlier page this mill has doubled pulley grooves on the slowest setting for maximum torque and I intend to take full advantage of that. While these belts are both rated at the same size (52" circumference) one is slightly looser than the other. What I could have done is purchased "matched" belts which are made to precise tolerances specifically for when you are matching two or more belts. This is minor to me and the tighter belt will probably stretch a bit more than the other bringing them into balance.
Here is the machine setup with a small vise attached to the worktable. Inside the vise is a small scrap of brass.
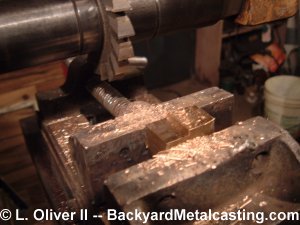
Here is a close up of the brass cut. It's a 1/8" deep cut and the machine did it fairly easily even though I had to move the work through the cutter slowly.
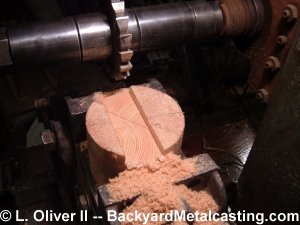
Here I was doing some practice by milling wood. This is a slot that I milled in a block of pine. This was done in several passes. Even though the cutter speed was probably to slow for wood working the cut is extremely smooth.
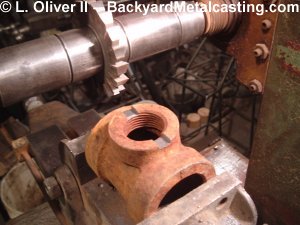
Of course I had to try it out on some iron so I milled this slot in an old pipe fitting. It's a clean slot and was done fairly easily.
Here is my first milling project. The silver piece in the middle of the photo is an aluminum bracket that is used to tension the blade on my bandsaw. The original cheap cast iron bracket broke. Notice how I machined the top and face flat as well as milling the side slots for the steel guides to slide in. Notice the sand texture still on the side. I did not mill it flat since nothing will contact it. Aluminum was used since I didn't know if I'd even have the skill to make this but now that I see what I can do I'd like to make a new bracket from steel or brass. Click the photo for a larger view
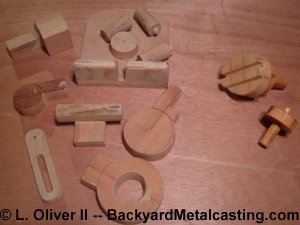
These are patterns for the Gingery designed dividing head. These are not all of them nor are they all complete but that's neither here nor there. They'll be ready when I'm ready for them or I might buy a dividing fixture instead. On the right are patterns for the fly cutter. And I made two different bottom halves of the patterns so I can cast one to fit a 5/8" shaft (as the book describes) and one for a 1/2" shaft to fit a smaller spindle adaptor that I have. I'm also working on some angle plate patterns.
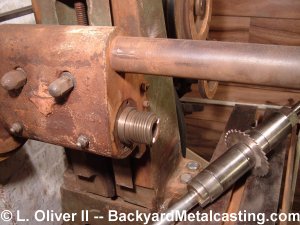
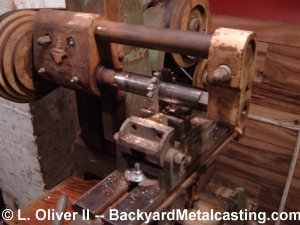
Here's the machine with the arbor and cutter removed. Take a look at the threads on the end of the spindle. They are just like the threads on the spindle of a lathe. This gives me the option to build the universal compound described in the Gingery mill book and cast a faceplate for this machine to do large diameter turning work. With the milling head at it's maximum height I can fit a 19" diameter faceplate on it over the table. But I still have to remove the overarm/support bar above the spindle which is currently stuck in place... To the project depository.