Go to section: | Machine Rescue | Moving and Reassembly | Discard after use |
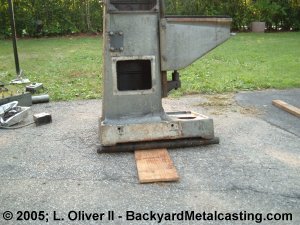
Just like the Ancient Egyptians are believed to have moved stones for the pyramids, I'm using rollers (an iron pipe) to roll the milling machine into the garage. Although the method is primitive it actually works very well. It's a good thing too, I tried using a hand truck and the weight bent the axle! I only used one pipe since I was working alone. Basically, I tilted the machine back and kicked the pipe under it. The pipe actually rolled over the wooden board since the ground is uneven. Then a slight backward tilt and a push from behind sends the machine smoothly riding the rolling pipe about 2 feet. Then I tilt the machine again to reset the pipe. It's very slow but reliable.
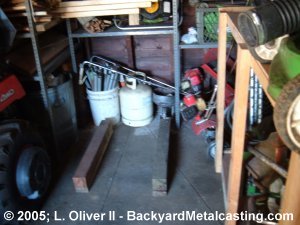
Here is the area I cleared in the garage and the 4 X 4 boards I'll set the miller on. There's actually a 2 X 4 nailed to the bottom of each 4 X 4 for extra height (easier to get a jack under for lifting). It's not an ideal location but those are the breaks.
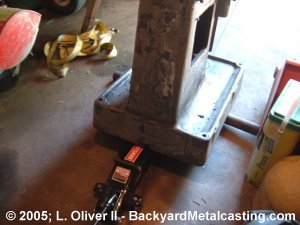
This 2-1/4 ton floor jack (a.k.a. trolley jack) helped a lot in lifting the mill column onto the boards.
At last the miller column casting is in position on the 4 X 4's. Getting it onto here was a job plus over time! I had to use a sledge hammer (to better position the boards under the mill, a pry bar, the pipe, my own muscle power and of course the hydraulic floor jack. Having those little hydraulic jacks around is almost like having a friend with super strength helping you out.
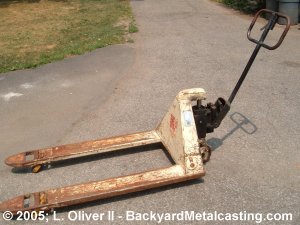
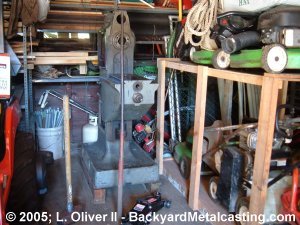
Here is an old hydraulic pallet jack I won on Ebay. It has a 5,500 pound lift and carry capacity with about a 6" lift. This would have made moving the machine absolutely simple but the Ebay auction didn't end until 4 days after I brought the mill home. I decided to just get the job done the hard way (pipe method) rather than wait. And besides, there was no guarantee I was going to win the auction! This pallet jack will come in handy in the future. I replaced some worn o-ring seals, replaced the hydraulic fluid (it was grey-ish green with white masses in it..! Either REALLY old fluid or not real hydraulic fluid) and bled the air from the system. I intend to also build a platform so this jack can be used as a regular cart.
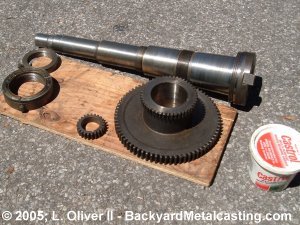
Here is a look at the spindle and spindle gears prior to installing them. The tub on the lower right corner is automotive axle bearing grease. I put it all over the spindle and gears before installation. I figured that if the grease can withstand the bearings in a car's axle they can withstand a milling machine spindle.
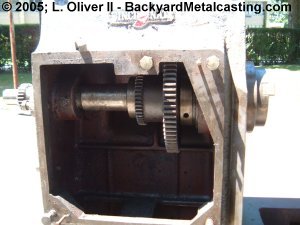
Here is the spindle and it's gears reinstalled in the column. The transmission bolts over this hole. These gears are turned directly by the transmission's gears. The transmission's gears are turned by the belt pulleys.
Here is the transmission on a scale to be weighed. I wanted to know exactly how heavy these parts are. Here is a listing of some of the main components;
I was able to muscle and brute force lift the all the components back onto the mill for reassembly EXCEPT the work table. I had to use a hydraulic jack to help raise it into position. But a hydraulic engine hoist would have been easier.
Here is the transmission bolted to the side of the column. I just plain manhandled it's 187 pounds into place then held it there with one hand and one knee while installing the bolts with the other hand. Yes that old paint job looks terrible. A note about safety!!
If you are not in good physical fitness or have a bad back or whatever, DO NOT attempt to disassemble or reassemble a machine this large without assistance! Just don't do it! There are MANY chances for injury. I'm happy to say that I did not suffer any injuries, but after lifting many of the components my back, arms and shoulders were plenty tired! Truthfully, it was not fun! Fortunately I exercise by lifting weights but there is no doubt that lifting a barbell is A LOT easier than lifting an awkward hunk of iron!
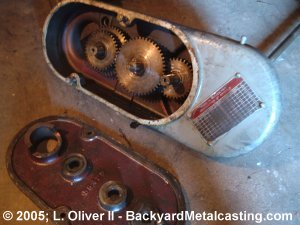
Here is the gearbox for the worktable's power feed. This bolt's to the rear of the column and a rotating shaft sends power to another shaft connected to the worktable's handwheel bracket which also has gears in it. And these handwheel gears are connected to a pinion type of shaft which ingages a rack on the base of the work table. Yep, it's probably easier to understand with an illustration or just looking at it. For those familiar with tractors, the power transmitting shaft is similar to the power take-off on a tractor. Go to the next page.
Go to section: | Machine Rescue | Moving and Reassembly | Discard after use |