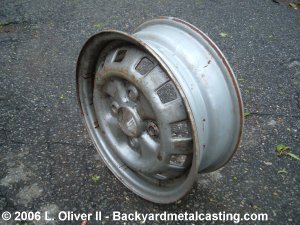
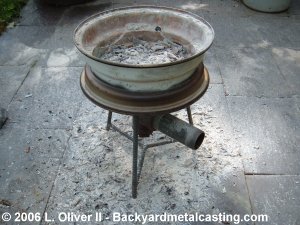
This is the car wheel I decided to make the forge out of. It has a fairly nice internal volume for holding the fuel and the holes in the face (which will be the forge's bottom) will work well to release spent ash.
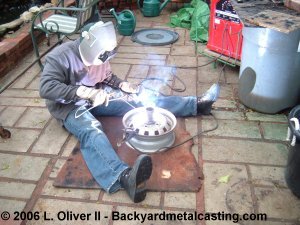
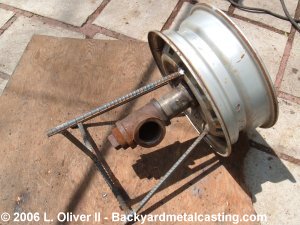
The first thing I did was weld a pipe to carry air into the forge into the center hole of the wheel. This hole went over the axle nut and is almost exactly the same size as the outside of 2" steel water pipe, so that's what I used. The pipe is just a 4" long section with threads on one end.
This photo was taken with the camera on a tripod using the automatic timer. Do not attempt to look at or photograph a welding arc without proper protection!
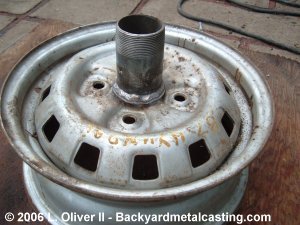
Here is the air pipe welded into place over the center hole. You may notice some yellow writing just above the square holes. It says "87 Hyundai" So I'm guessing that's what this wheel is from.
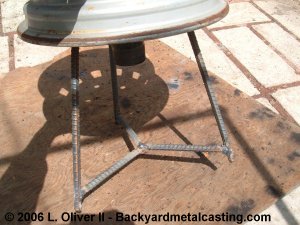
I welded three sections of rebar onto the wheel to work as legs. They are about 12" long and seem to be a good height for stability. Welding the legs at even 120° intervals was easy since there are 12 square holes in the wheel. So I welded a rod at every fourth hole (12 divided by 3). I then added three braces to the legs to secure them further and prevent shifting.
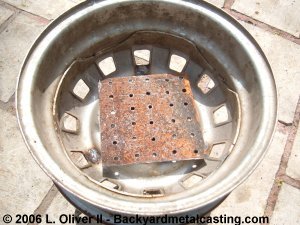
To get nice air distribution throughout the coals I made this simple grate from a scrap of 1/8" thick plate.
I screwed a pipe tee to the air pipe under the forge to attach the blower with. I used a "T" fitting instead of an "elbow" fitting because I can simply unscrew the cap on the bottom of the T to let the ashes fall out. I'd have to disconnect the blower to get the ashes out of an elbow connection.
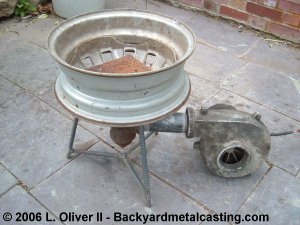
A short length of pipe connects the blower to the "T" fitting. This is the same blower I use on my waste oil burners. It's pretty grimy right now but it's given great service since I built it in 2003. I'll eventually get a blower specifically for this forge and I'll probably weld a mount onto the forge legs to hold it.
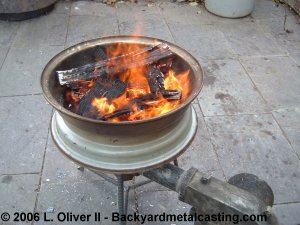
It's simple to start the forge with crumpled newspaper, cardboard and thin sticks. Once the sticks have ignited I add slightly larger sticks and then finally split wood about the diameter of an average person's wrist. That's what's burning here. There are so many air holes in the grate, and the wheel itself that there was very little smoke during the ignition and absolutely none once combustion really got going. Tremendous heat was being put out and I think using actual coal or even barbecue charcoal would produce a positively vicious amount of heat which would radiate out in every direction. Safety tip!! Try to avoid chromed wheels when building a forge, the chrome may burn off creating toxic fumes. Other coatings on the wheels may do this as well so use caution especially with the first few forge usages.
Here is the result after the forge has cooled down. Most of the ashes have fallen out of the forge through the holes in the bottom. This is great when using the forge for long periods of time so a bunch of ash doesn't just build up and clog the air flow.
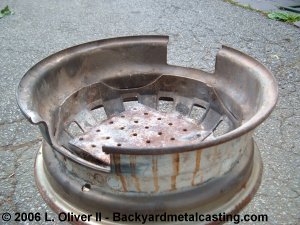
If I have to heat long pieces of material, perhaps when forging a sword (yeah, like I know how to do that...) I can lay the steel in these slots so it can lay down deeper in the coals. This modification was made after the first test run.