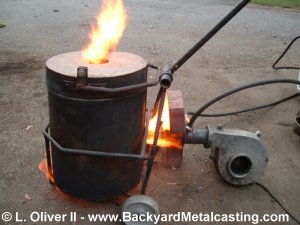
What an easy task it was! Almost surprisingly easy. With the basic principals learned from building the larger injection style burners I was able to scale it down and get a working mini oil burner on my first try! The size is scaled down but certainly not the performance! Here is my hobbymelter™ furnace running exclusively on used motor oil. Waste vegetable oil (WVO) works as well. This is the same fuel I use for my big furnace to melt iron. This was the first firing of the mini oil burner and I consider the test to be a roaring (literally and figuratively) success!
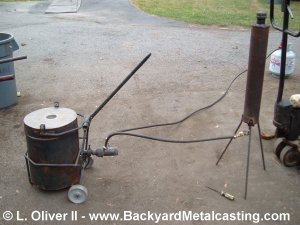
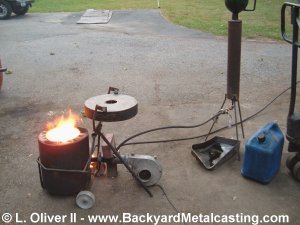
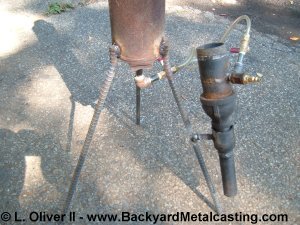
Here's the initial setup (minus the air blower which is missing in this photo). The furnace on the left and the tall oil tank on the right. Also note the propane tank in the background on the right. It was used to preheat the furnace and ignite the oil, then the propane was completely shut off. I could have avoided the propane warm up completely if I instead started a wood fire in the furnace which would ingite the oil.
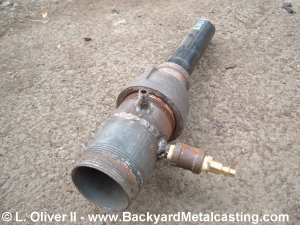
Here is the basic burner. It's made from 1" pipe with a reducer coupling to attach the blower. The connection with the brass "quick connect" fitting is for propane and the small connection at the top is for the oil. The oil pipe is "L" shaped and delivers the oil just past the reducer section of the burner. I'm gonna go out on a limb and state that this is the world's smallest working, gravity fed waste oil burner. If anyone would like to build a smaller one to challenge that claim I'll be quite happy about it so the technology will continue to advance! And of course don't think I'm not working on a smaller one myself!
In the paragraph above I said that this may be the world's smallest working, gravity-fed waste oil burner. But Lo! Indeed someone has challenged that claim. Before I even posted this page on the internet I received an e-mail from a fellow metalcasting enthusiast who has built his own 1" pipe based waste oil burner! Check out his version at Moya034's mini waste oil burner. I am quite happy to see that others are advancing this "green" technology!!
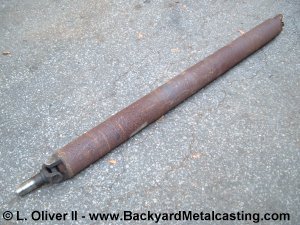
This is what I made the oil tank out of. It is a driveshaft from a 1986 Jeep Comanche pickup truck. It's basically just a hollow tube so it was easy to cut a section of it to make a one gallon capacity tank.
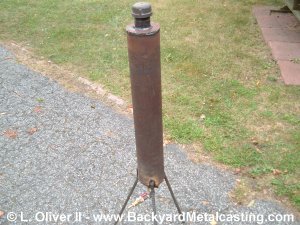
Here the fuel tank with some legs welded on and the oil valve assembly.
Here is another photo of the furnace running on oil. Plenty of heat here. I'm planning to improve the oil regulation system so I can control the flow better. With a small furnace a little oil goes a long way. Once I've completed the design and testing of this "oil conversion system" it's quite likely that this type of apparatus can be used to convert the majority of propane burning furnaces to oil. That'd be very economical for fuel intensive tasks like melting loads of scrap into ingots etc.
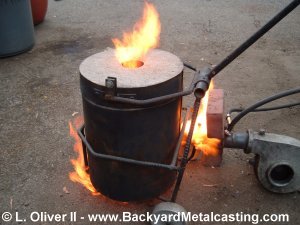
In this photo I have the oil flow too high and flames are coming out of every opening, even the drain hole in the base. Seeing this I'm convinced that this same small burner could fuel a larger furnace of 10 or 12" diameter bore easily to melt aluminum or brass. Maybe even iron. I'd like to also mention that I'm building a pattern for a small blower to compliment the burner. The blower shown is from my big furnace and was all I had at the time.
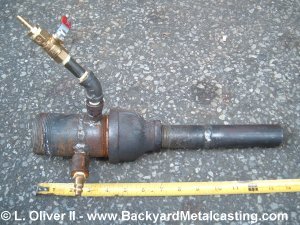
Here is the burner with some modifications. I added the valve to control the oil flow right at the burner. The valve on the tank is the general shut-off valve and the one on the burner is to regulate the oil. It wasn't there originally because I didn't have another valve at the time. I also installed a longer tube made from welded scraps of pipe to extend the tip of the burner further into the chamber. Since the only purpose of this burner is to inject the proper amount of air and oil into the furnace it's dimensions (tube length and diameter, etc). are less critical than they are with propane burners (which can be very finicky). Additionally no special jets, nozzles or tips are necessary.
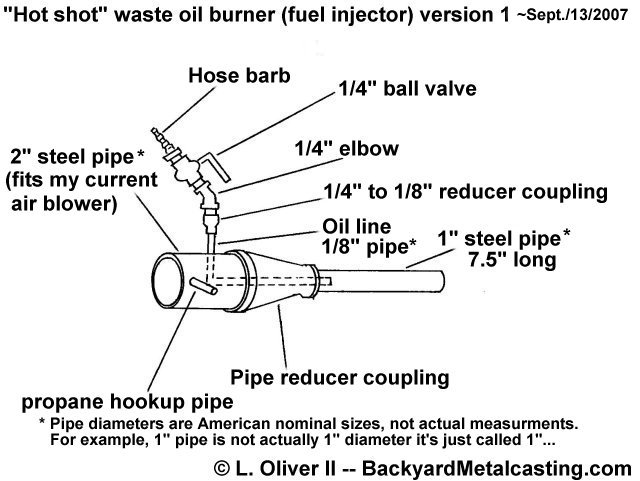
Here is a diagram of the burner. Technically it is the G8-IS3 based on it's predecessor burners specifically "The Brute". I call it "The Hot shot" for easy reference. Aside from the blower this burner is not much larger than a typical venturi propane burner. But it has a lot more "kick." Being that these burners are simply meant to inject a proper amount of oil and air into the hot chamber I'm confident that clever design can make these burners even smaller! Click the diagram for a larger view.
Now this is what I call "packing heat". Here I've added a burner "holster" to the base of the fuel tank. This way the burner can be removed from the furnace and holstered for storage. I still need to make a small blower to fit this burner. Continue to oilburners part 11 to see a test firing of the modified burner.